How to start a Food Blog – Three Steps guide from udupi-recipes.com
Are you a foodie? You love experimenting new recipes? You often search for recipes while browsing the net? If your answer is “Yes” to all the above questions then you must START YOUR FOOD BLOG.
You don’t need to be techie to start your blog, it’s quite simple and takes just 15 minutes for your blog set up.
How to start your food blog? Follow these 3 steps.
- Domain name and Hosting
- WordPress installation
- Beautifying the blog
Disclaimer: Please note that some of the links below are affiliate links and I will earn a commission if you purchase through those links. I have used all of the products listed below and recommend them because they are helpful and are companies that I trust.
1. DOMAIN NAME AND HOSTING
The first thing you have to decide is name for your food blog. Brainstorm for a while and decide which domain name suits your food blog that is to be born. Mine is udupi-recipes. It is really exciting and fun to finalize the name. Once you are done, head up to Bluehost and check if your selected domain name is available or not by entering it in the box that looks as below.
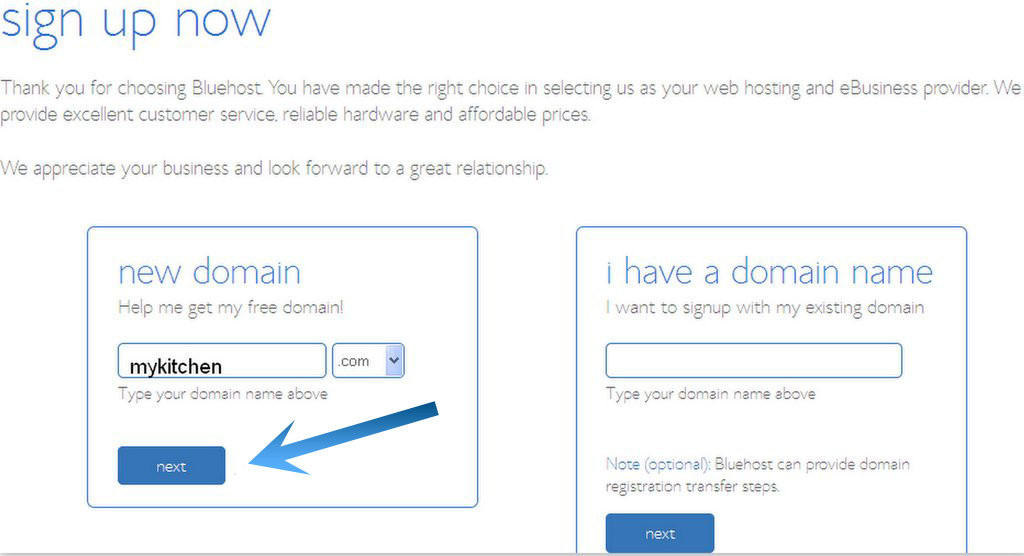
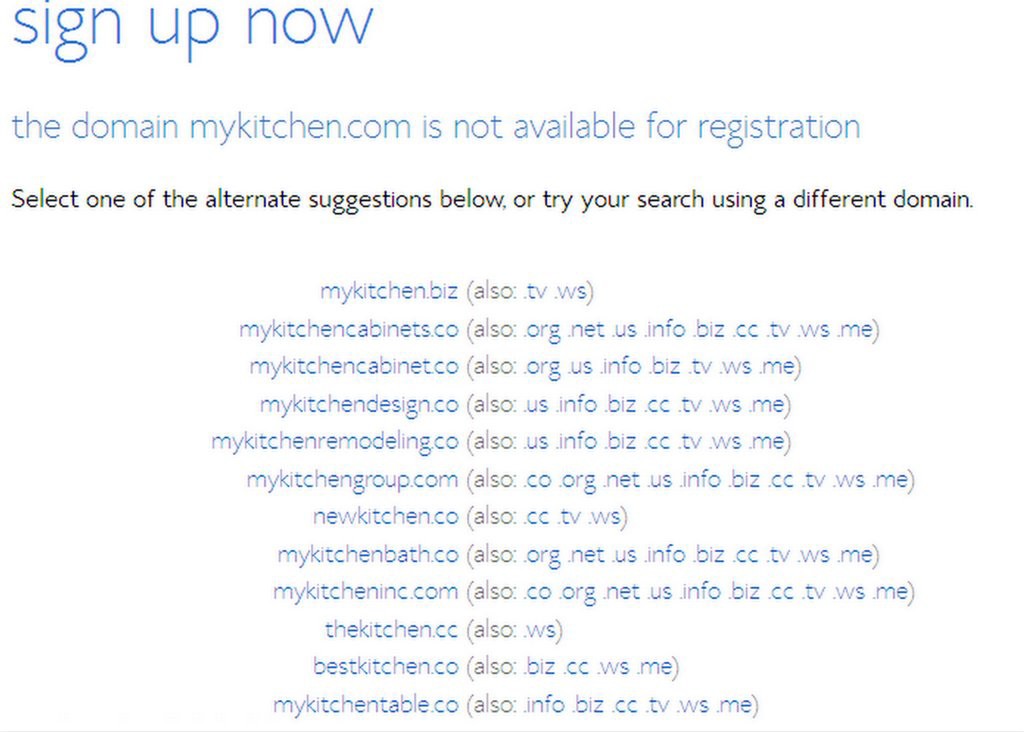
Say suppose the selected domain name is already in use, then Bluehost gives you a big list of alternative names. You can choose from the same or think of some other best possibilities on your own.
1) HOSTING
Next step is hosting your domain name. Hosting refers to renting some space for your blog in the web. For your blog to exist and be accessible to the world, it must run on a web server. Bluehost is the company which I have chosen to host my blog and I would recommend it to you too.
Bluehost is now offering STARTER plan of just $3.95 per month. Exciting!!!! It offers free Domain name registration as a BONUS. I have not experienced a single day of downtime from the day 1 till today with Bluehost. They are the trusted, reliable and affordable hosting solution providers in true sense. If you want to your site to be hosted in Bluehost just CLICK HERE.
Package information screenshot that I used is just below.
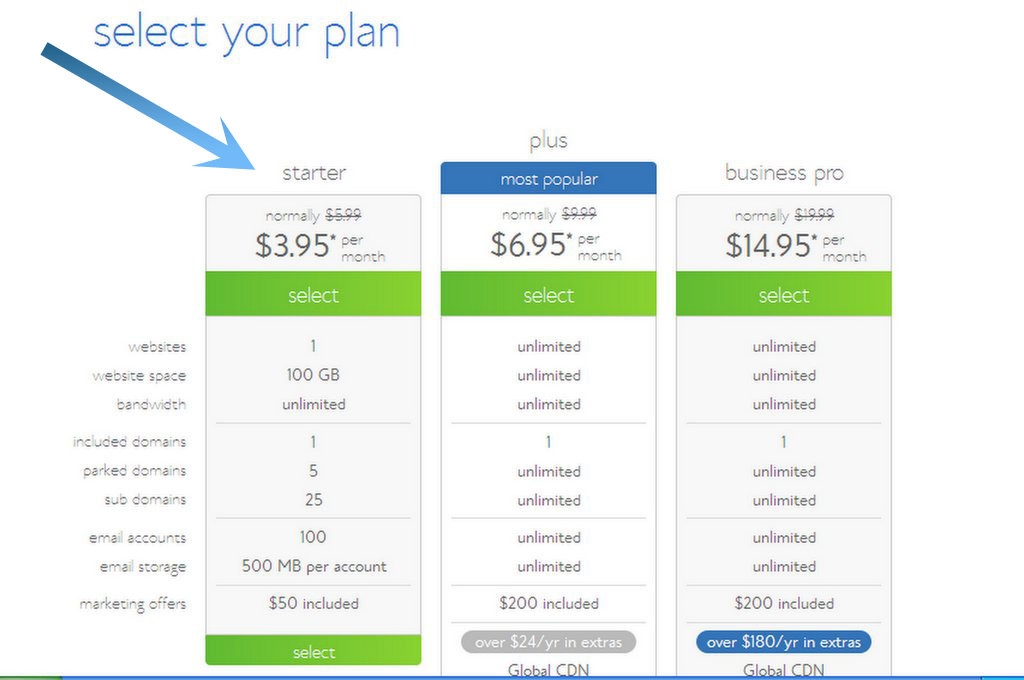
I have chosen STARTER Plan and paid in lump sum instead of monthly, which saved me quite a bit of cash.
Below is a screenshot of what I use for package information settings.
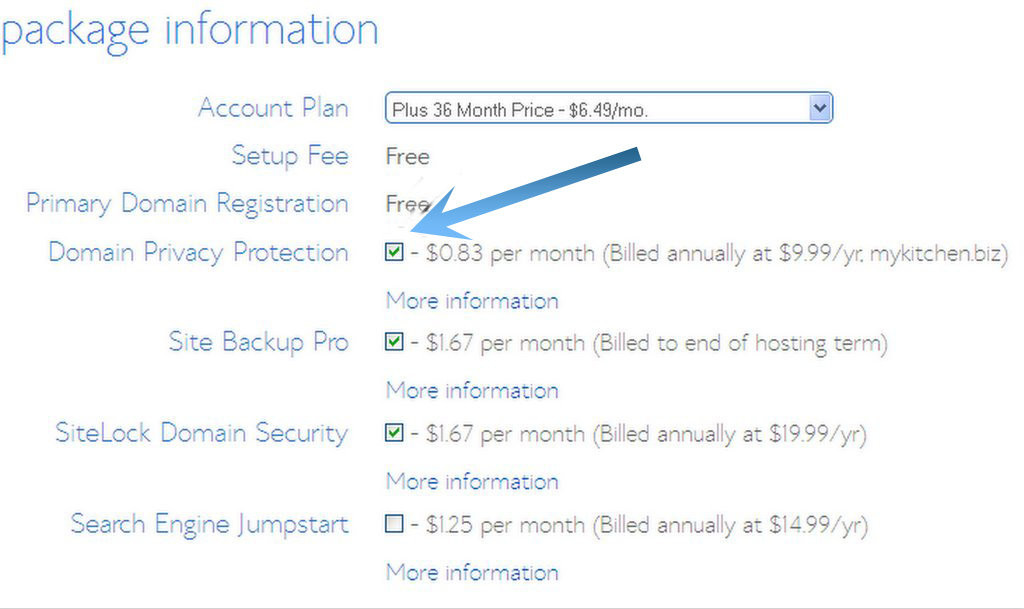
I would recommend you to check DOMAIN WHOIS PRIVACY which shields your personal details from being displayed to the public.
Just a REMAINDER: Bluehost offers free DOMAIN NAME registration as you host with them.
2) WORDPRESS INSTALLATION
Once you have completed registering with Bluehost, next step is to install WordPress, which is a blogging software that is easy to use and install.
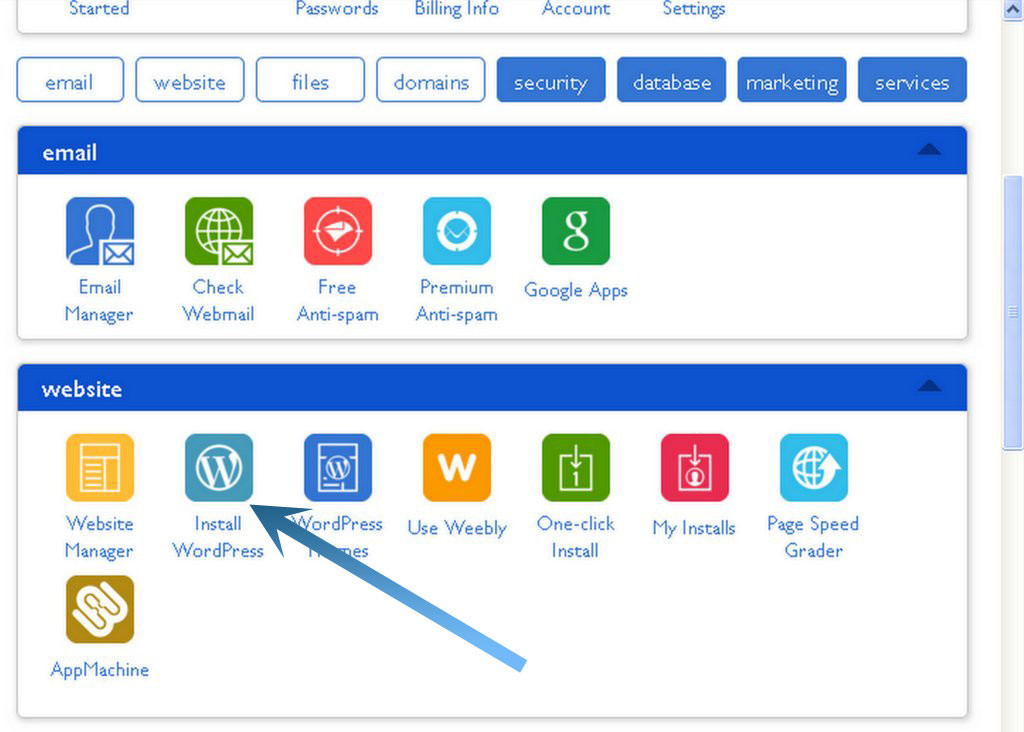
In order to install the software, all you need to do is login to Bluehost using the user name and password that is provided to you through email as you register with them and scroll down to Website section of the first page and click on Install WordPress logo.
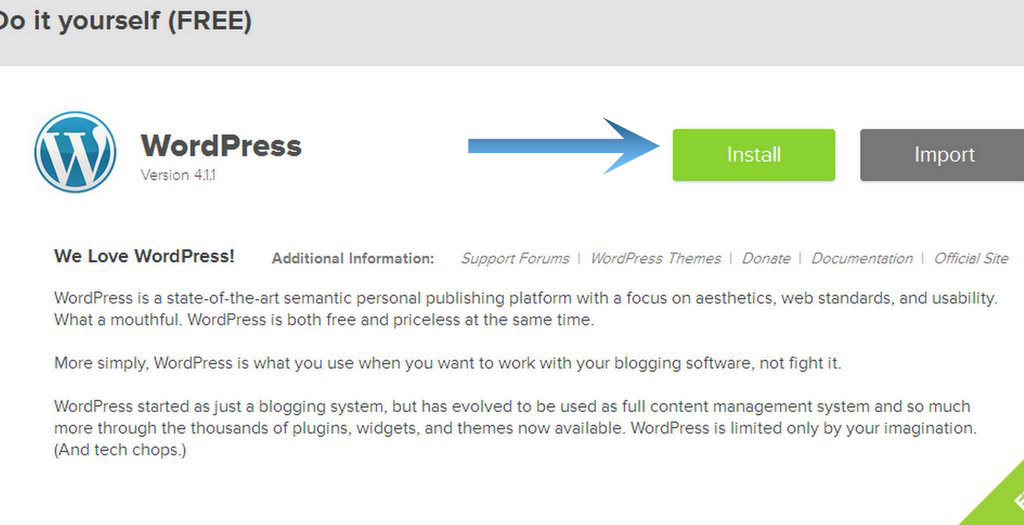
On the next page click on Install button in the “Do it yourself (FREE)” section.
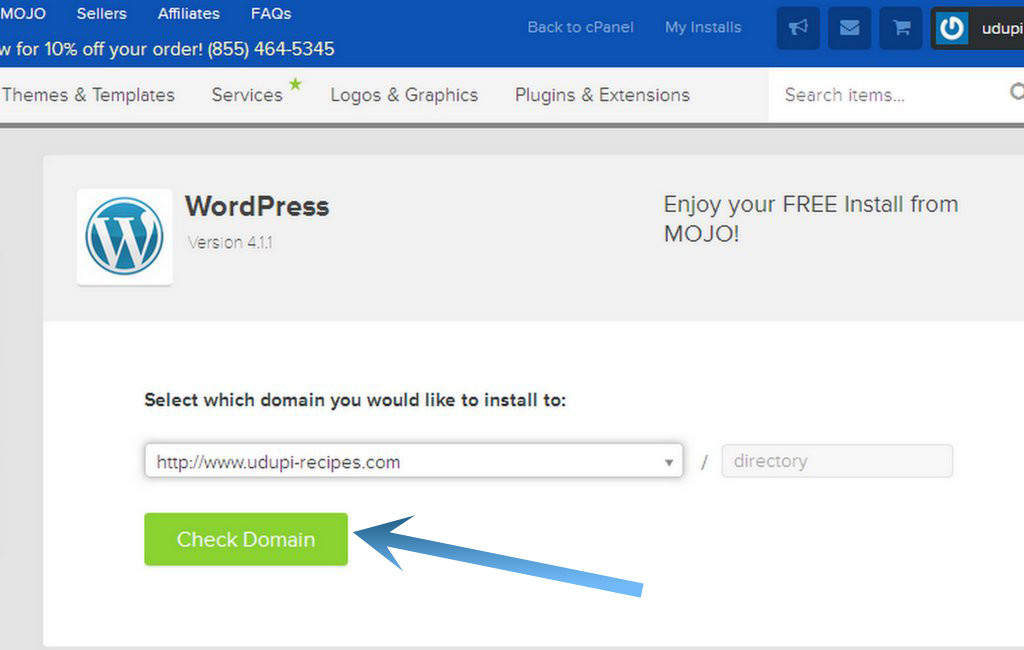
Click the “Check Domain” button.
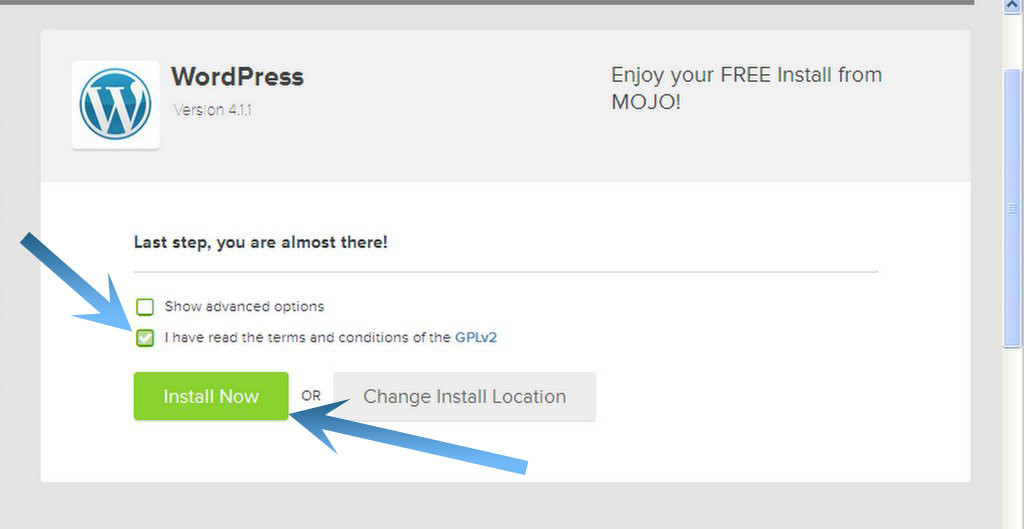
Check the “Terms and Conditions” box and then Click Install Now button.
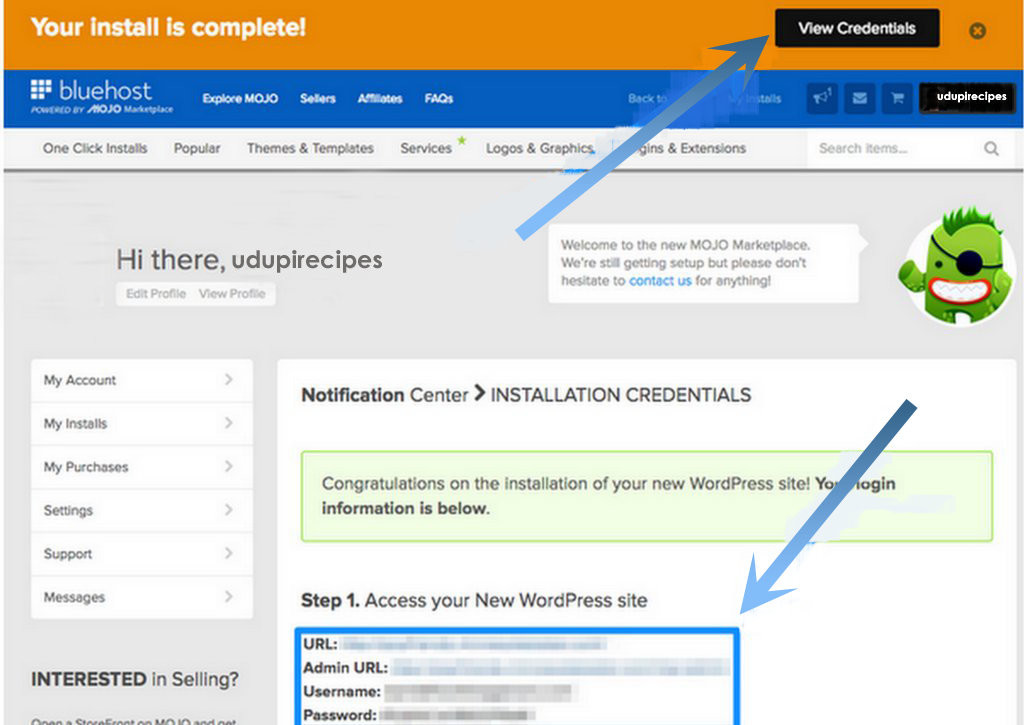
Once you get the message that says “Your Install is Complete”, you have to click on view credentials button to note down the Login URL and Password for the first time login to your blog. Later you can change the password to something unique and memorable.
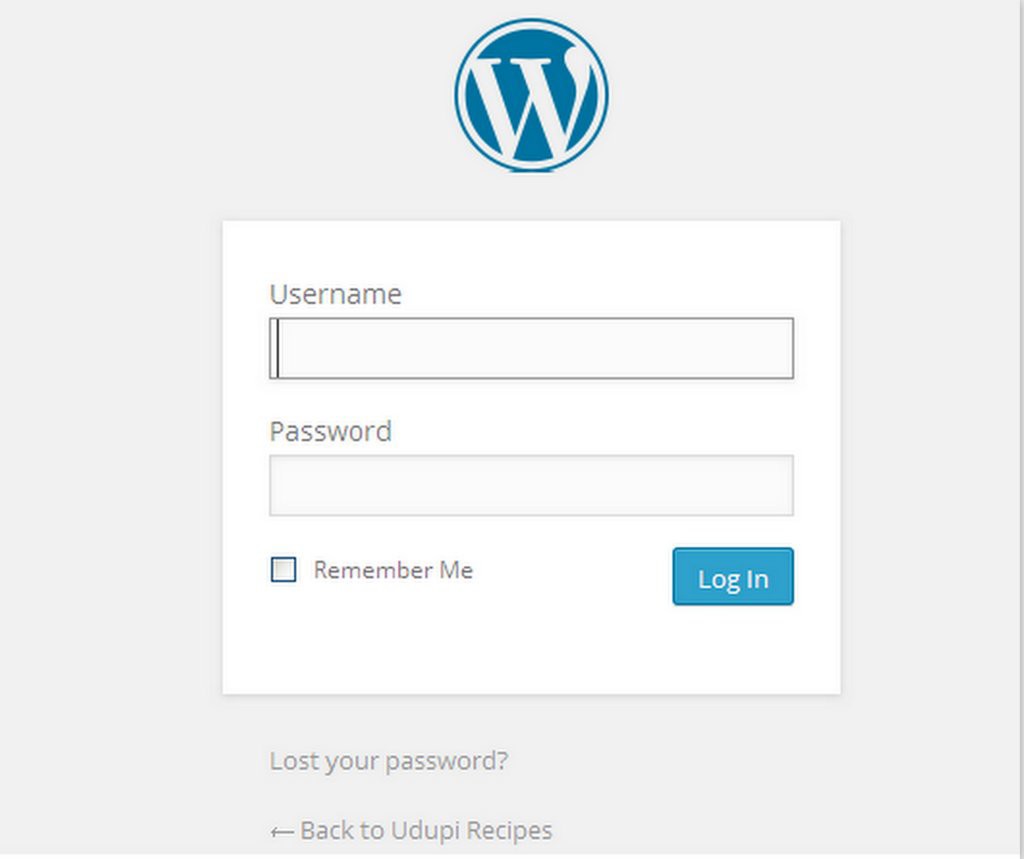
Type your Login URL into your web browser. You’ll see a login screen like the one below. Enter your Username and Password that you have copied from the previous step.
3. Beautifying the blog
Woho….You have all set with your first food blog. Warm welcome from udupi-recipes, how is it feeling? Ready to share your new recipe?
Before you run to your kitchen, you can select theme for your food blog to beautify it. There are tons of themes available for you to choose here.
So once you are up with your own blog, leave the URL in comment section. I would love to have a look.


Thank you for sharing such an insightful and well-written article! I really appreciate the depth of knowledge and clear explanations provided. It’s refreshing to see a detailed take on this topic. Looking forward to reading more of your posts!